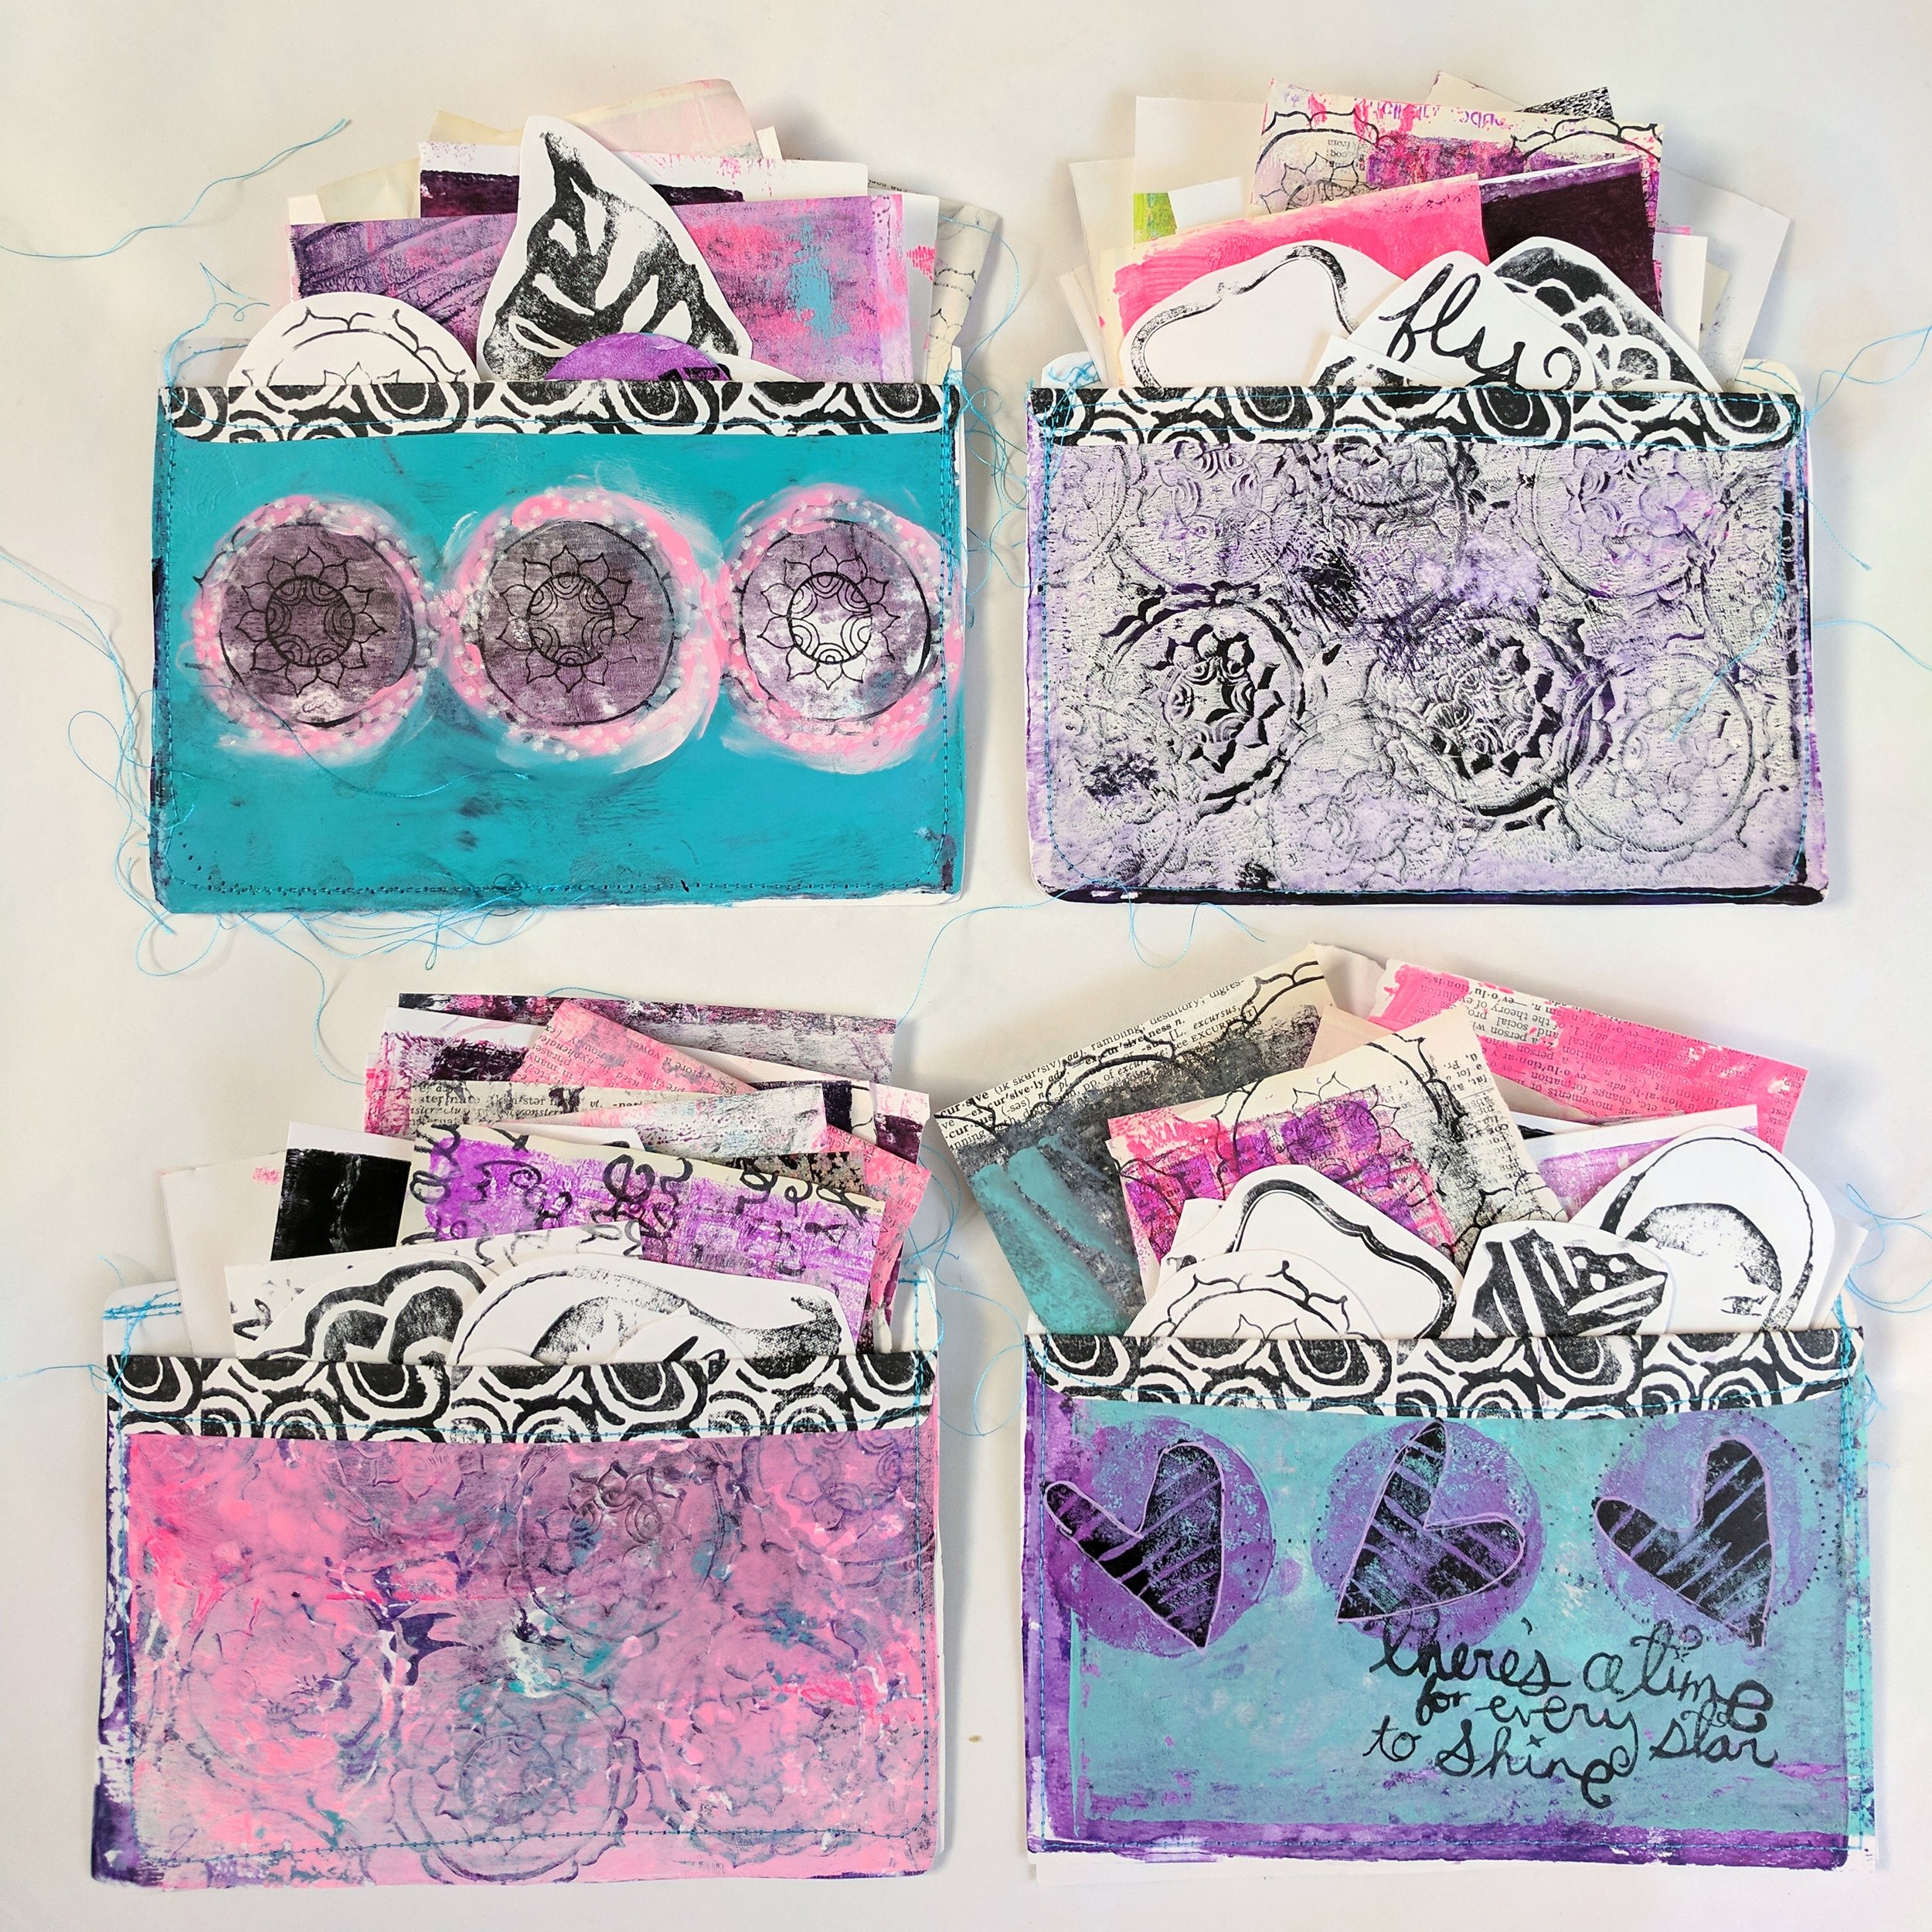
Happy Mail Art Pockets
Get creative and have fun!

Anna Friesen
I remember the first time I received happy mail. It was a little envelope decorated with washi tape, and inside were delightful little snippets of happy and life-giving words snipped from magazines.

To see such a beautiful thing in your mail box is such sweet serendipity and it can turn a grey day into a happy one. Seriously. It happens to me often! Giving is special, but so is sending! I love sending cheerful art on the pony express!
If you really want to touch someone, send them a letter. - Australia Post - tweet that!
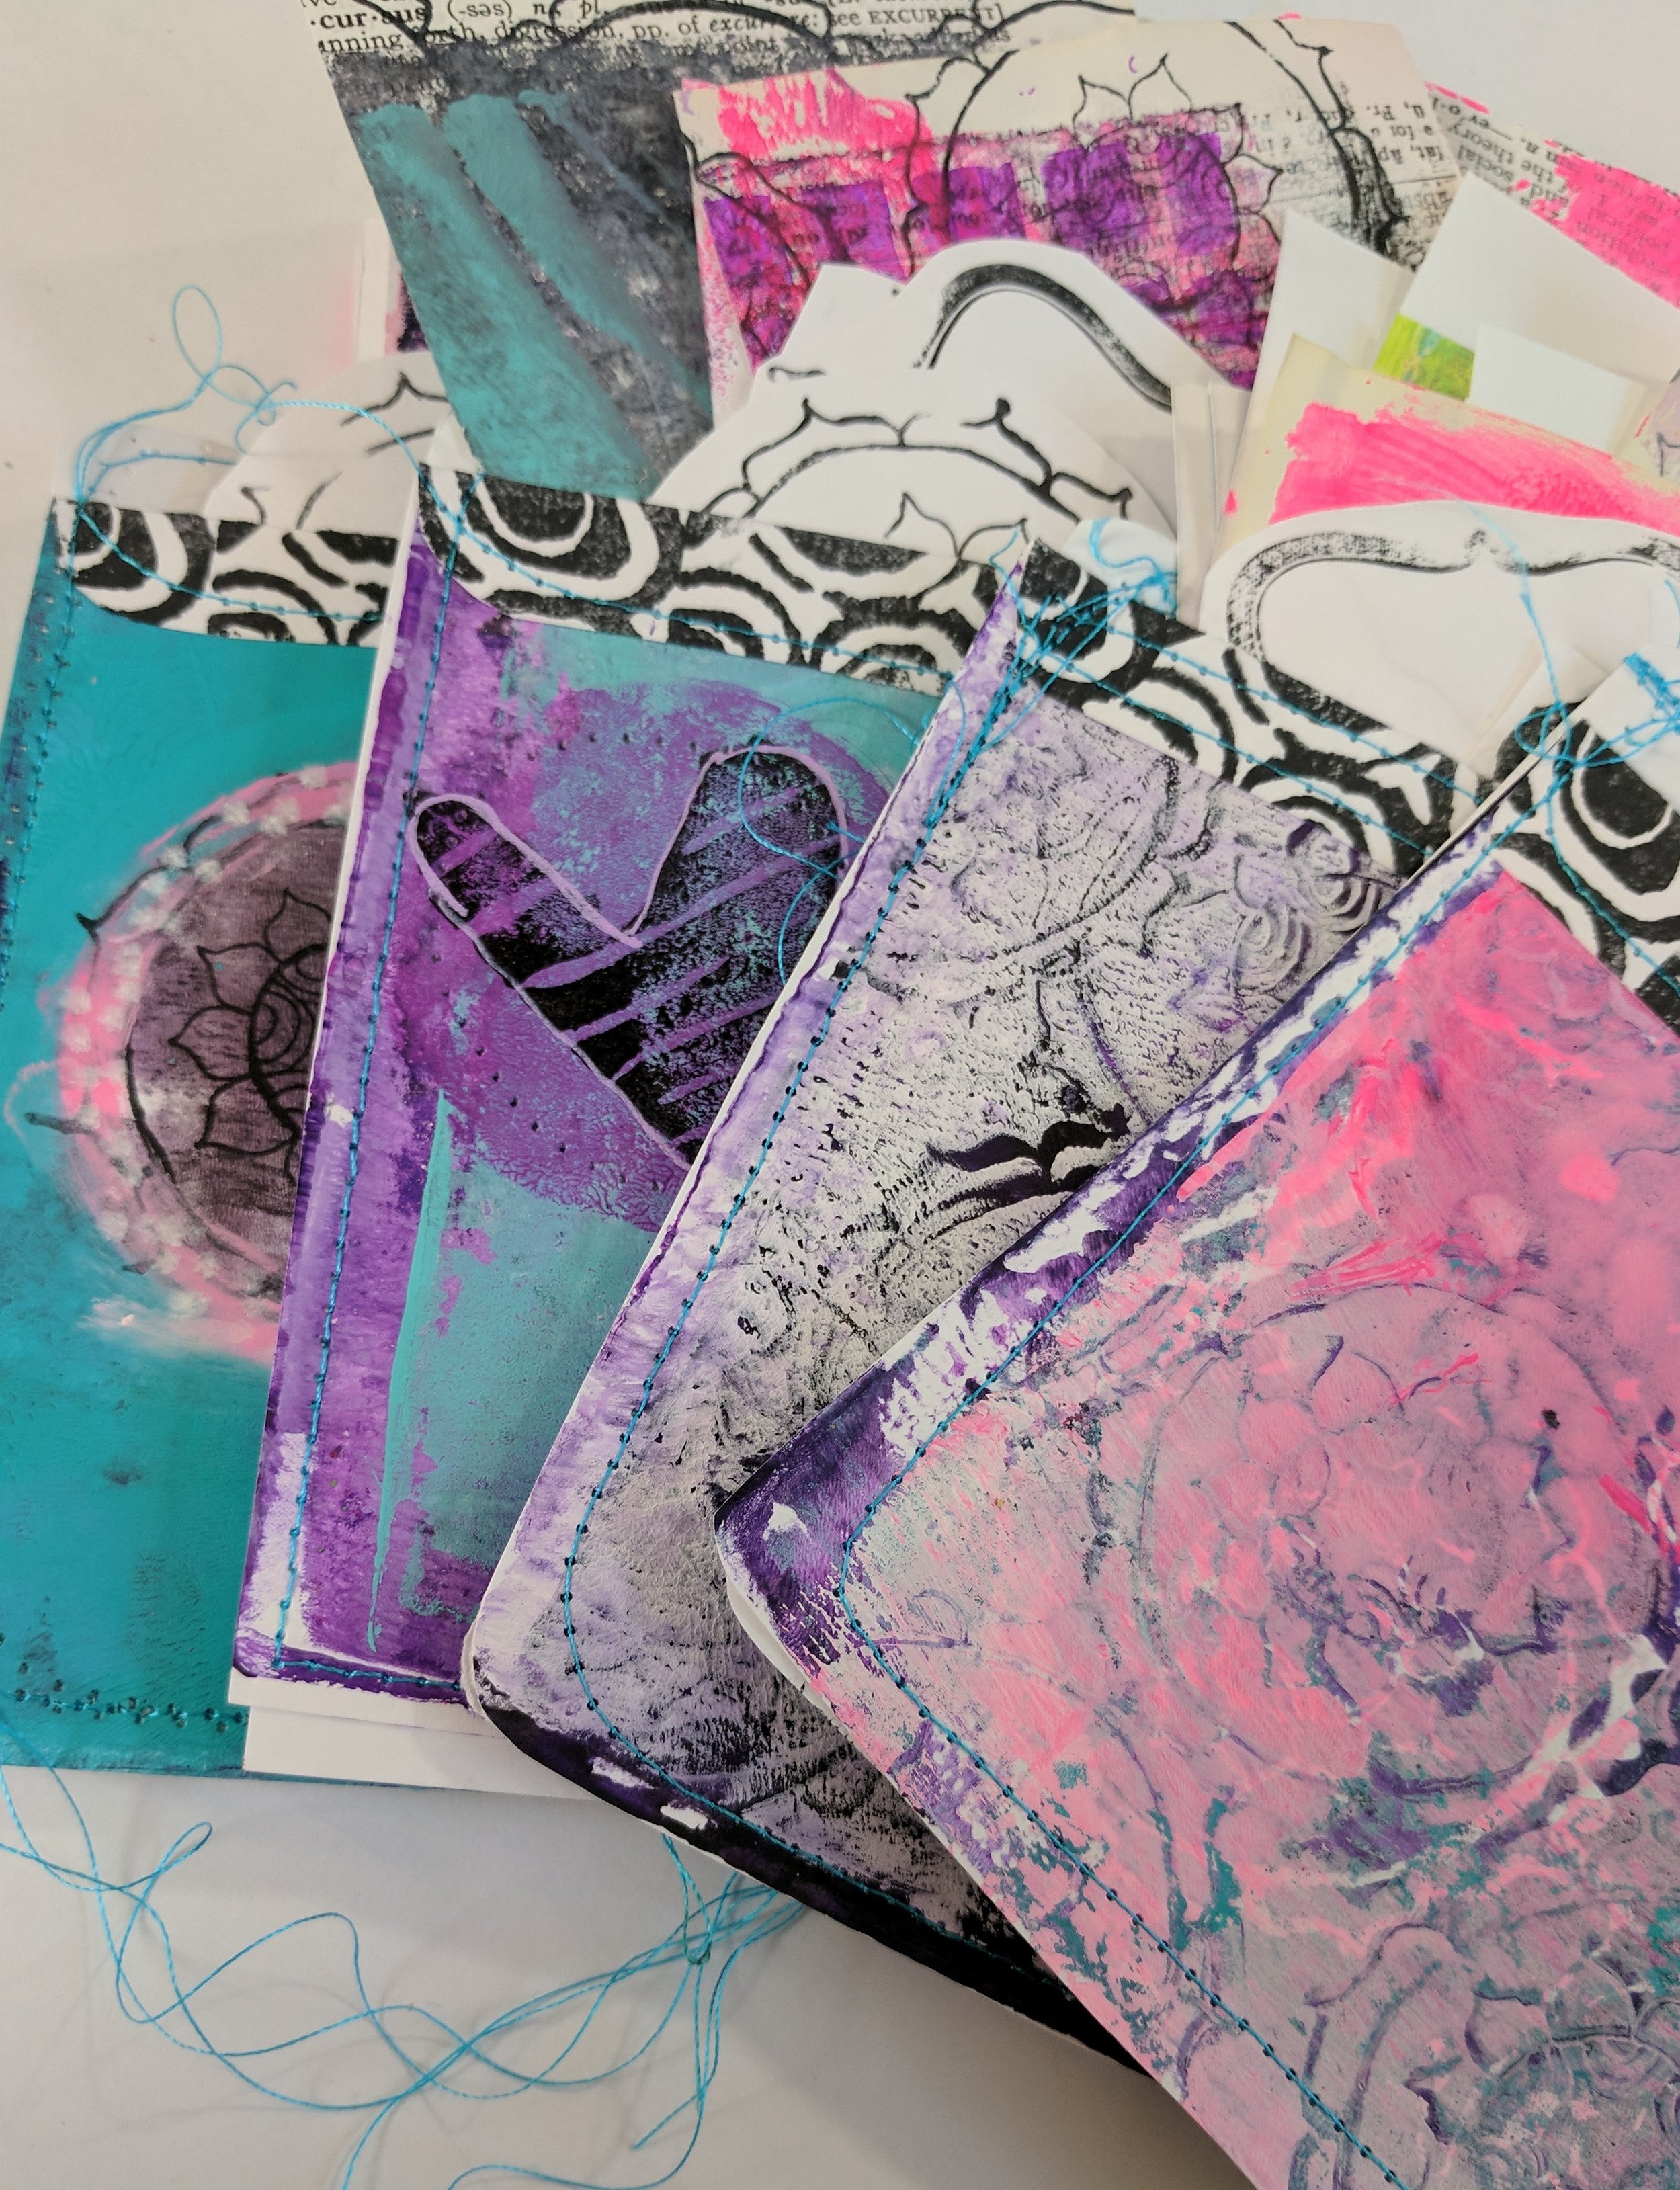
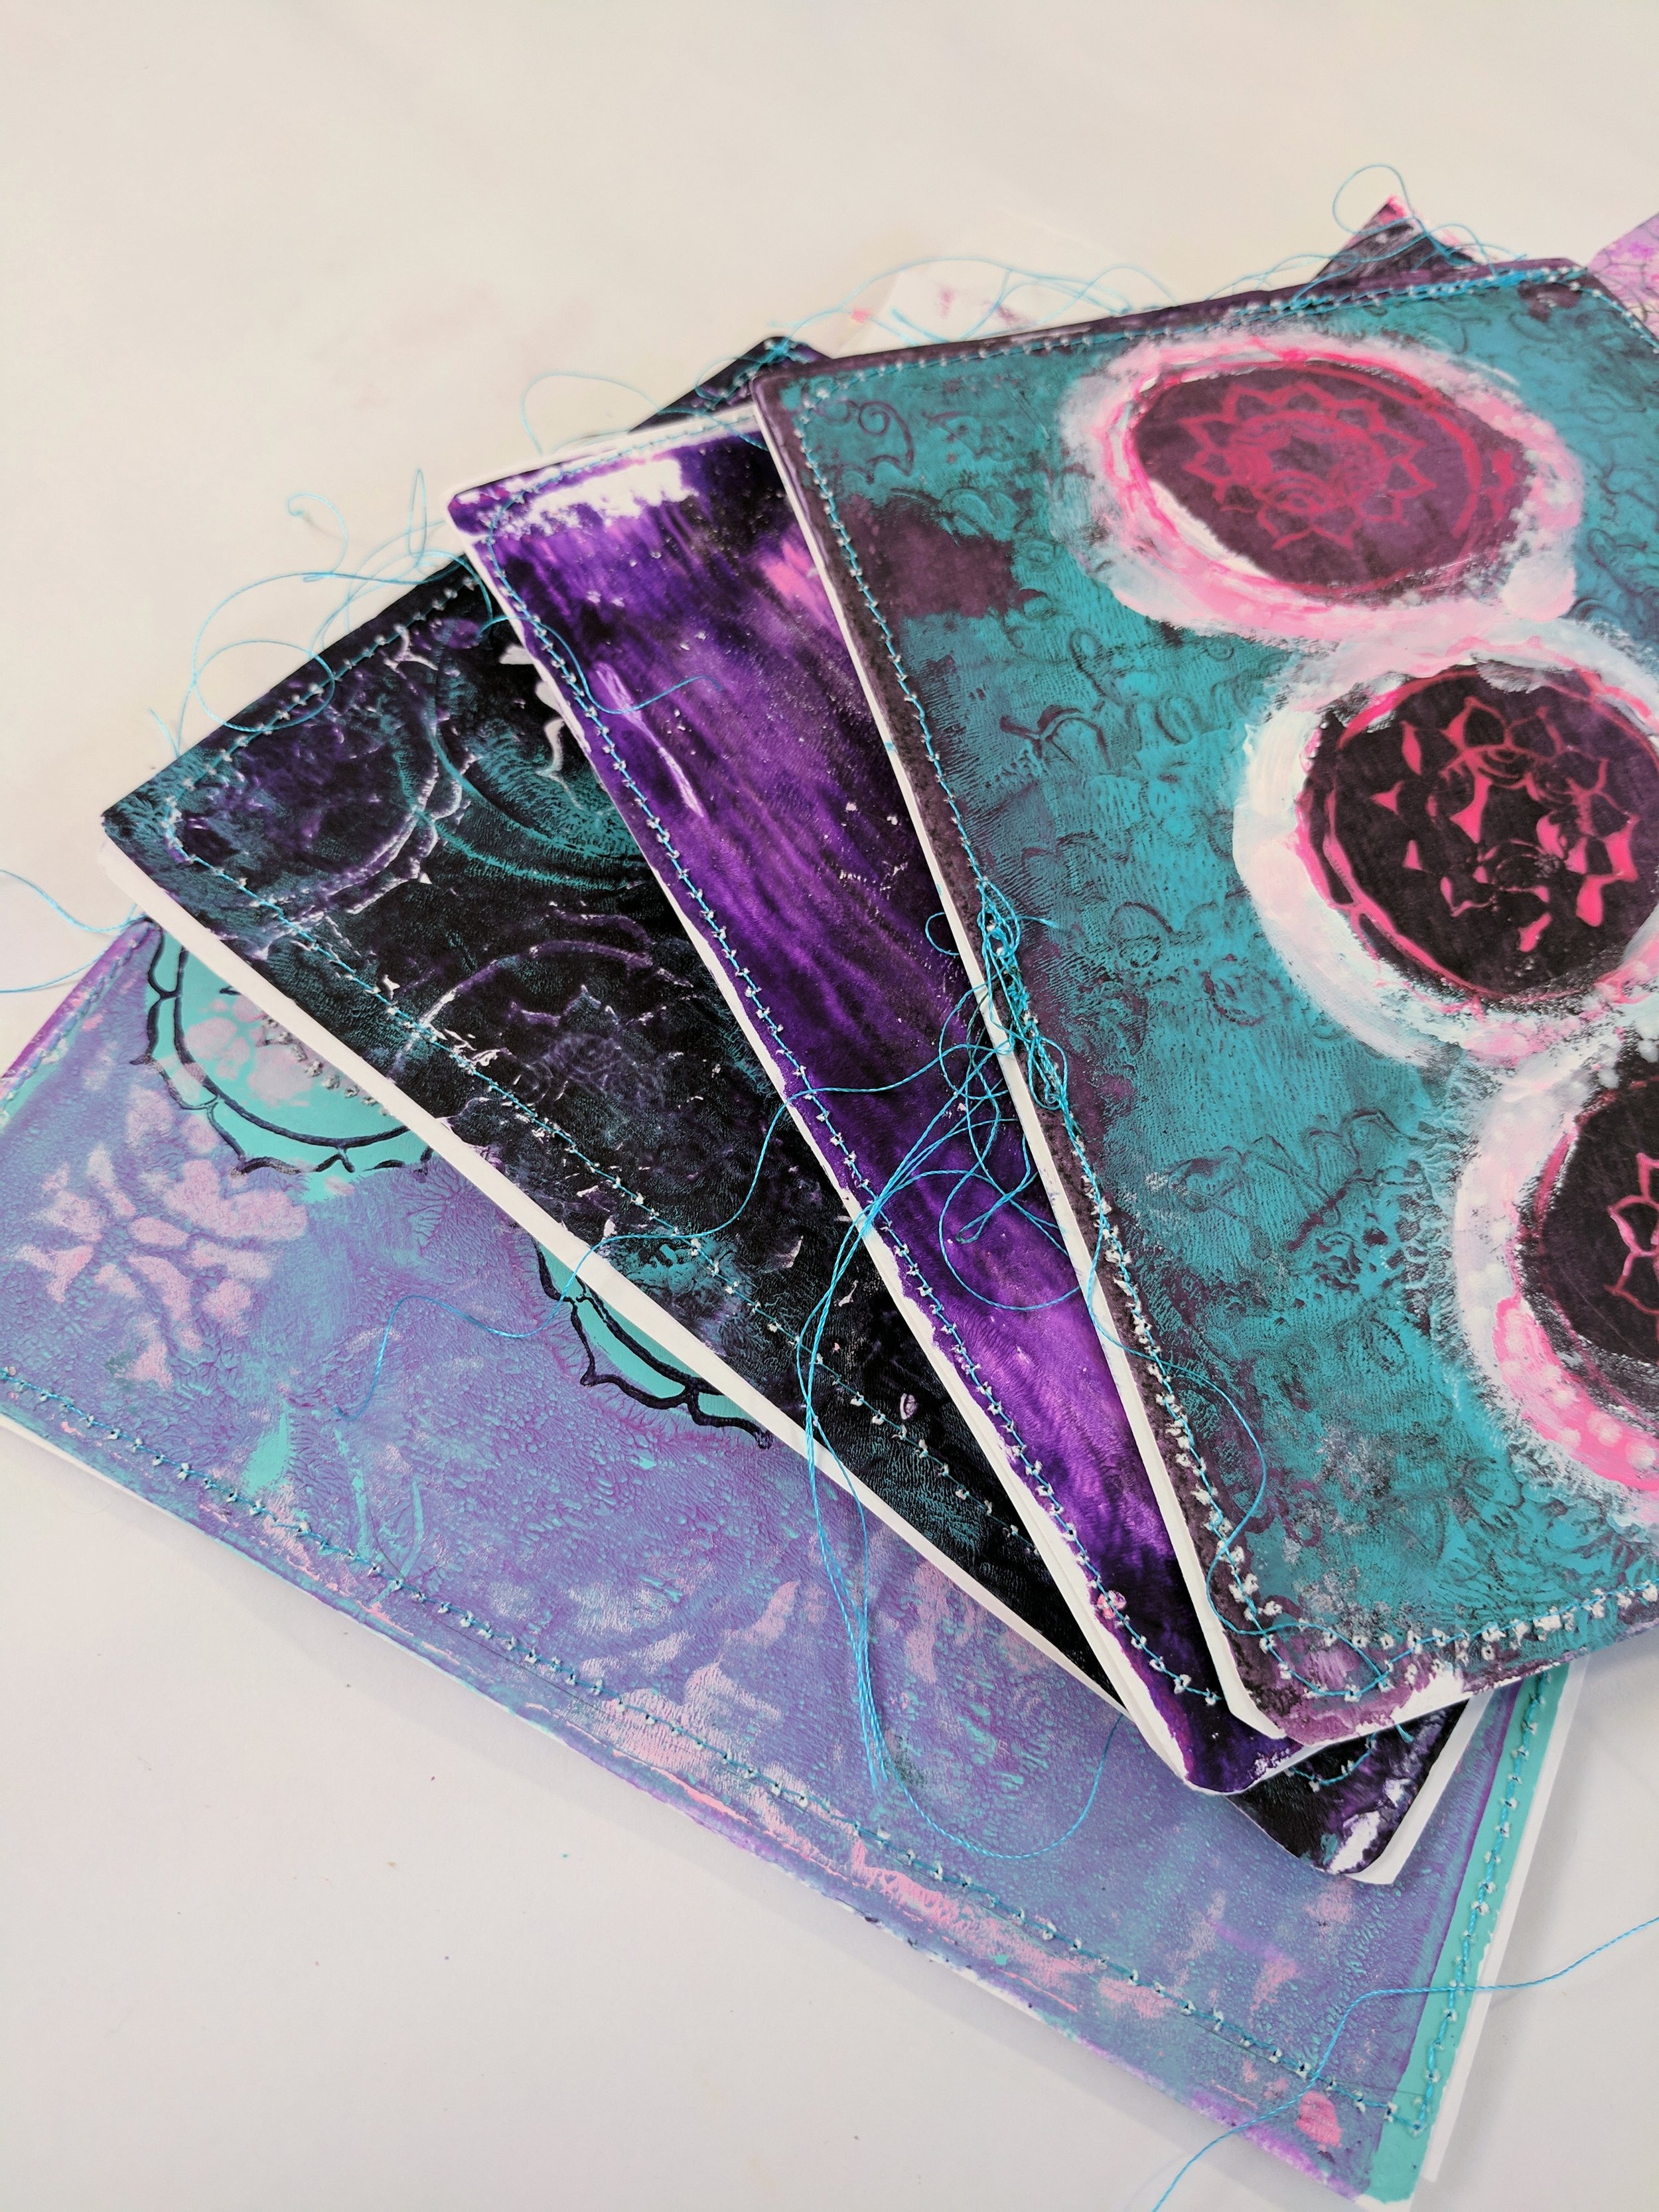
We can always use ideas to pretty up our mail art, right? Enter these sweet little pockets. I used a 5x7 gelatin plate to start the design. Rubber stamping on the plate is an easy way to add texture and shape to prints, and who can resist the whimsical images of Paperbag Studios stamp sets?! Not me. :)
Going Deeper...
What is your most important artist tool? Is there something you can't live without in your studio and why?
I'd say stencils are my most essential tool. The shapes often spark an idea and if not that, they give me an easy start of color and shape.
Is there an element of art you enjoy working with most? Why?
The nuances of colour and the infinite ways hues interact with each other. It's a conversation and I want in on it. :)
Supplies Used
Gelli Plates
Brayer
Circle Squeeze Punch
Heat Tool
India Ink Pad
Acrylic Paint, Assorted color
Fine Tip Sharpie Marker